Also, Windows 11 looks different than Windows 10, and it has introduced many new features. For a regular user, switching to Windows 11 might be a massive jump. There are many settings that Microsoft has hide in Windows 11. Many users have reported incorrect dates & times on Windows 11. If your system’s time is incorrect, things could go wrong. Usually, Windows 11 syncs the system time via the internet. But, if you are not connected to the internet, you might get the wrong date & time. Sometimes, the wrong date and time can also be a result of system file corruption or glitches. Hence it’s always best to manually change the date and time on Windows 11. Also read: How to Change Windows 11 Lock Screen Wallpaper
Steps to Change Time & Date On Windows 11
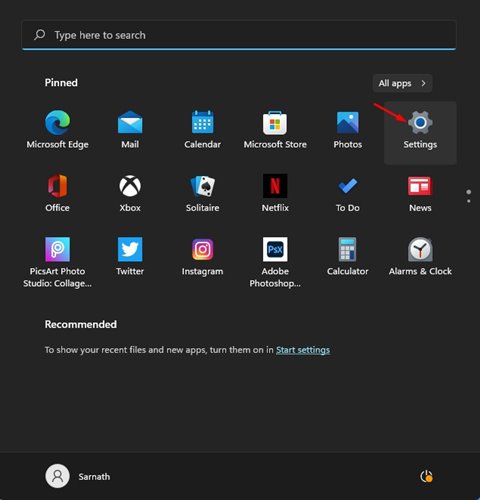
So, if your Windows 11 PC is showing the wrong date and time, you are reading the right article. In this article, we will share the best method to change the time and date on Windows 11. Let’s check out. Step 1. First of all, click on the Windows Start button and select ‘Settings.’
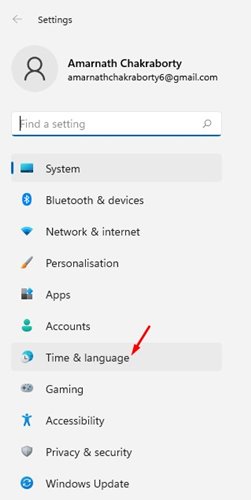
Step 2. On the Settings page, click on the ‘Time & Language’ option.
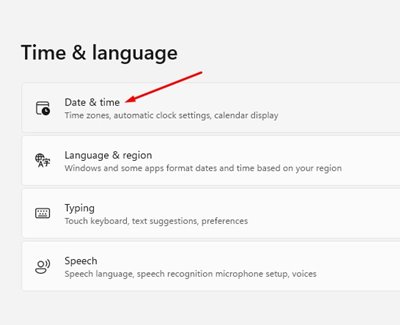
Step 3. On the right pane, click on the ‘Date & Time’ option.
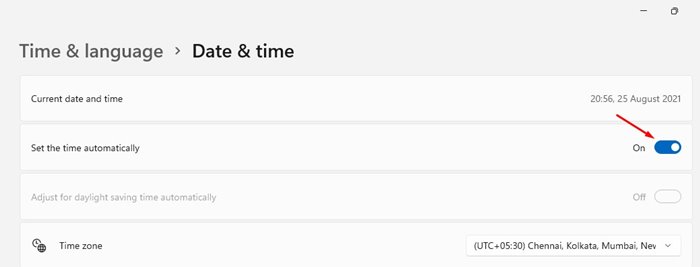
Step 4. On the next page, enable the option ‘Set time automatically.’
Step 5. Now click on the ‘Change‘ button behind the Set the date and time manually option. To manually change the date & time, you first need to disable the option in Step 4.
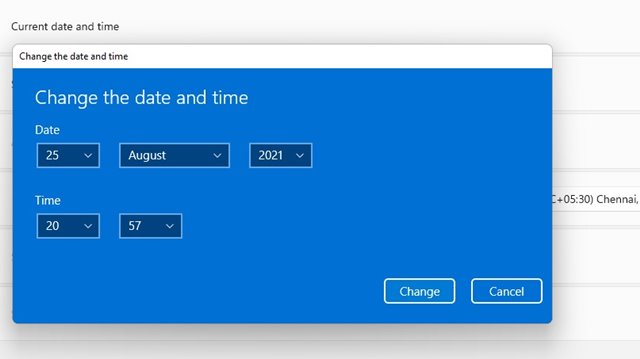
Step 6. Set the date & time on the next window and click on the ‘Change‘ button.
Step 7. Now move back to the previous page, and set the time zone for your region as well. Step 8. Now scroll down and click on the ‘Sync now’ button on the Additional Settings.
That’s it! You are done. This is how you can change the time & date on Windows 11. So, this guide is all about how to manually change the date and time on Windows 11 operating system. I hope this article helped you! Please share it with your friends also. If you have any doubts related to this, let us know in the comment box below.
